Kelliefish13's Blog

Travel writing, Poems and Stories


2 Comments

Bibs

Little Moo dribbles like mad and has done since he was about 3 months old (and still no teeth to show for it). Luckily we have been given quite a few bibs some new and some hand me down so to start off with we were fine. But as he has got bigger so has the dribble and he soaks through several bibs a day. I soon discovered there are several types of bibs, some for spills (we had lots of that too until he was about 6months and his reflux cleared up), some for eating, some to look pretty and some for constant dribblers.
I learnt what to look for in a bib – multiple layers for good absorption, waterproof/resistant layer on back so they don’t soak through to the clothes and adjustable so that the bib sits close to neck and the dribble doesn’t sneak underneath.
Now babies have been dribbling for a very very long time, surely there are lots of bibs that meet all those requirements. As it turns out there aren’t any that I have found, though I have found a few that met 2 out of 3 and all of those were around $10 a bib, which is a bit more that I want to be paying for them given how many we use.

So I decided to make my own, and it turns out they are rather easy. I can choose the patterns and colours to match his clothes, make a whole lot at once and spend waay less. So far I have made 5 bibs and a pair of shorts for the the price of 3 bibs and I still have plenty of material left.

Tutorial to come.

What have you made recently? How easy was it?


Leave a comment

Kindle Cover

I got my kindle a week ago and found it weird to start with, until I started reading then I forgot about it and loved it. Still loving it. My main reason for buying it is that it is light and can hold many books so when I am travelling its way more convenient than carry multiple books. But a plus is that a lot of classic novels are free on it which is great as I have been slowly trying to make my way through them while in England.

But to go travelling with it I apparently need a cover to keep it safe from other stuff in my bag according to amazon. Fair enough I keep all sorts of crap in my bag that could scratch it or get it icky. So I looked at all their recommended ones, they looked ok some better than others but not really worth 25 pounds and up. So I made my own. Out of the felt I had left over from the creatures I made before Christmas. It doesn’t protect from bending but it does keep the stuff out.

Here is how I made it.
First I chose the colours (based on what I had left, I chose the only ones I had left in favour of going outside again) decided that wasn’t interesting enough so cut out red dots (using a bottle of almond essence to draw around for the circle, it was a good size) and stitched them on.

having done that I attached ribbons to tie it closed

Then used bright red blanket stitch around the edges.

This didn’t turn out quite how I envisioned it but I decided to keep going to see how it looked, then it seemed a lot to undo and do again so I left it. The uneven stitching does give it that ‘home made style’ but I think if I were to do it again I would stitch it inside out then turn it out so you couldn’t see it. Oh well live and learn.

Finished product


Leave a comment

Making stuff is fun. Penguin.


Not having a TV and being a fidgety person means I have some evenings with way too much time on my hands so I started making stuff for family. Having wandered through Cath’s Kitchen and seen a book on sewing and crafts I thought I could do that, only better. So off I went to the cute little haberdashery shop (I love the word haberdashery and am using it as much as I can) call ‘darn it and stitch’ and came back with lots of felt and other sewing goodies.
My favourite purchase was thisLots of threads
Which although you can’t see it very well is mending thread pack, which is I think 25 different colours woven together so you can pull out the colour of choice easily and its in the perfect length for hand stitching, perfect for crafts where many colours are needed and much cheaper than buying lots of cotton reels.

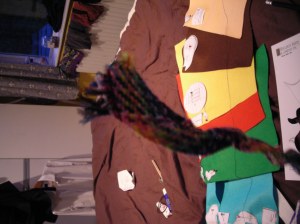
Once home again I started by making a list of what I wanted to make for each person trying to have it personal for them. Next I drew a picture of what I wanted the finished object to look like, front and back and labelled colours. Having done that I looked at all the different parts and what colours they were and turned them into pattern pieces by drawing each bit individually then cutting out and checking size. Once I was happy I pinned all the pieces onto the felt.

making sure each piece was labelled with the person it was for name on it so I wouldn’t get confused later (I also used different colour pins for each)

Then it was time to cut and figure out how to put the layers together I started out with the penguin for my sister because it required simply layering to piece together. first pinning the piece into place so it didn’t move as I sewed. then using small neat stitches just inside the white circle. Keeping the back as neat as the front.

then adding the eyes, two white semi circles with a small dot of black all carefully stitched on using tiny stitches. I used the scraps for the eyes as they hardly require any material.

Then I added the beak, a yellow triangle sewn just along the top so it is like a flat. I used a bit of extra cotton to make a loop up so that it can be hung, theoretically from a Christmas tree.
Then I got the back piece, same as the front but without the stomach, eyes and beak added and stitched her name using back stitch, I find it easy to do without a guide by you could use tailors chalk to mark it out first, or in pen on the back (which I used when embroidering stars)

Next step sew front and back together making sure they thread for hanging is at the top.